In recent months, artificial intelligence specialized in video creation has made impressive progress
Among these AIs, Pika Labs quickly stood out, first with its version 1.5, then today with its version 2.0. In the following article, I will show you the new features introduced by this update, explain how to take full advantage of them and give you some tips for optimizing your renderings.
Pika 1.5
Before getting to the heart of the matter with 2.0, a brief review of 1.5 is in order. The previous version already offered text-to-video and image-to-video, but the result often remained uneven:
- Generation times could be very long (several hours, even several days).
- Decent video quality, but below expectations for realistic or complex scenes.
- Pika Effects (inflate, melt, explode, etc.) entertaining, but not always suitable for professional projects.
Despite these limitations, many saw the platform’s strong potential, supported by an intuitive interface and a growing community.
The major new features of Pika 2.0
The main advance of this version 2.0 lies in the notable improvement of the algorithm. Text-to-video and image-to-video renderings are more precise and smoother. We feel that Pika Labs has refined its model in order to produce videos:
- Sharper (less blur, less distortion).
- Better animated (more convincing camera movements).
- More compliant with prompts (better understanding of your textual instructions).
Scene Ingredients
This is undoubtedly THE flagship feature of this update: Scene Ingredients (also called “Ingredients”).
The principle is very simple: you provide various “ingredients” in the form of photos (character, object, setting, etc.), then you describe the desired scene. For example: “A man holding a guitar in a modern living room, the camera pans around him.”
Pika 2.0 then assembles these elements in a single plan, seeking to preserve coherence (the same character, constant colors for the guitar, continuity of the decor over the entire duration, etc.).
This is a real asset, particularly for imagining advertisements or clips where you want to reuse visuals of products, people or places.
Better overall stability
Finally, the launch of 2.0 was visibly better anticipated than that of 1.5. Generation times still vary depending on traffic, but are generally less frustrating and it is easier to quickly obtain satisfactory renderings.
How to use Pika 2.0 step by step
The Pika Art interface
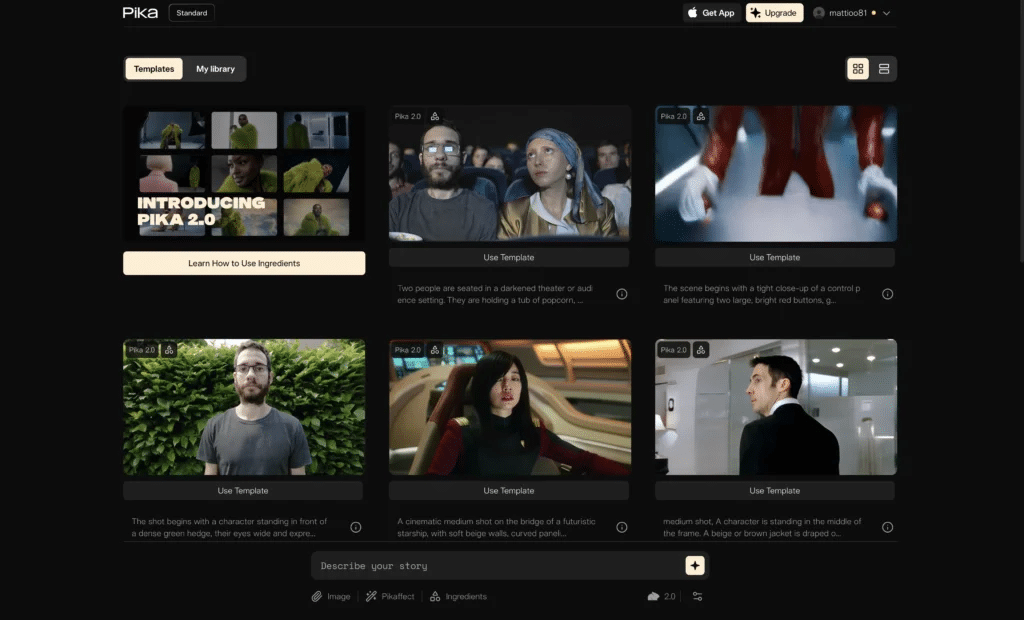
- Dashboard : displays the community’s creations on the home page, a good source of inspiration.
- My Library : where you keep your own videos.
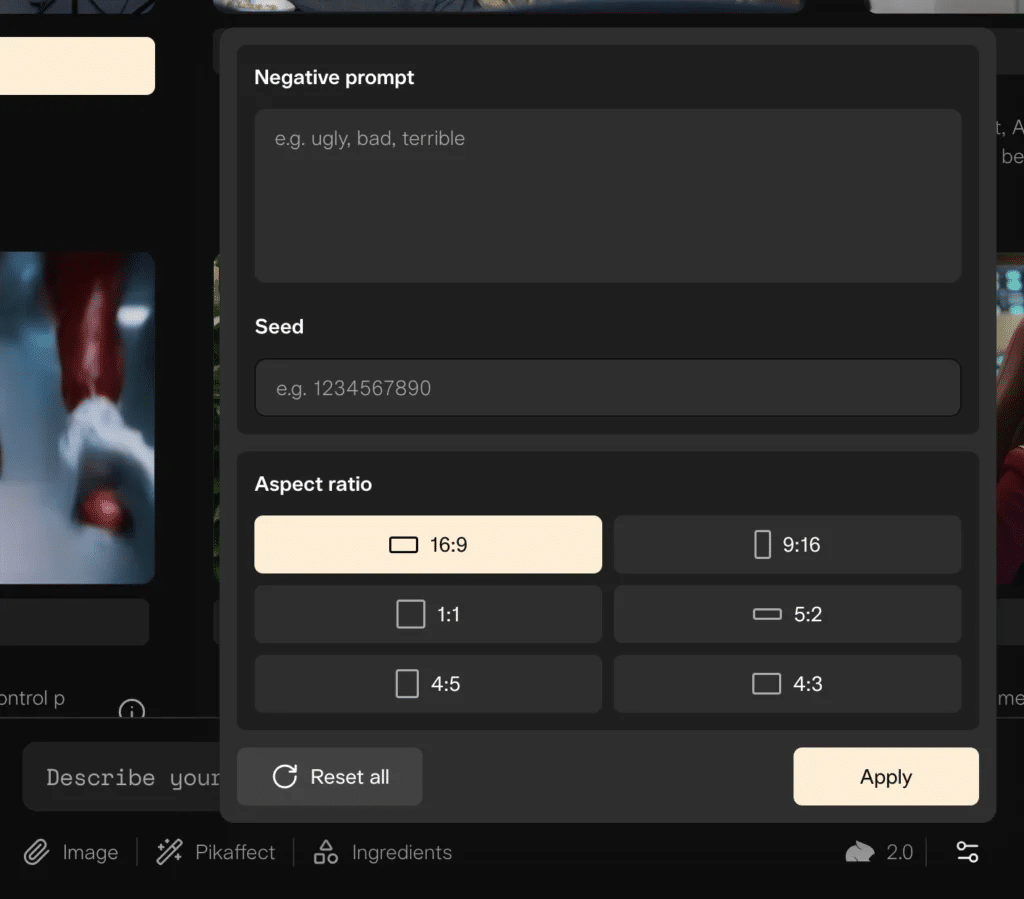
- Prompt bar : at the bottom, to write your text request or import an image/video. You can also select some parameters, such as the ratio (final format of the video), add a seed to reproduce the style of a previous video, or set a Negative Prompt if you want to exclude certain items. In practice, I sometimes add words such as oversaturated, blurry, light ray, deform, distort, ugly, warp if I don’t like the result.
Generate text-to-video video
- Enter a prompt in English (better recognized), for example: “Chewbacca on the turntables in a retro neon club, Stormtroopers dancing, electro vibe, camera moving around”.
- Select your advanced options: ratio, etc.
- Start the generation and wait. You will get a 5 second clip.
- If necessary, use a negative prompt to counter distortions (e.g. blurry, warp, saturated).
Generate image-to-video video
- Upload the image of your choice (from Midjourney or another source). It can be a photo of an advertising product or, as in my case, an image created with Ideogram.
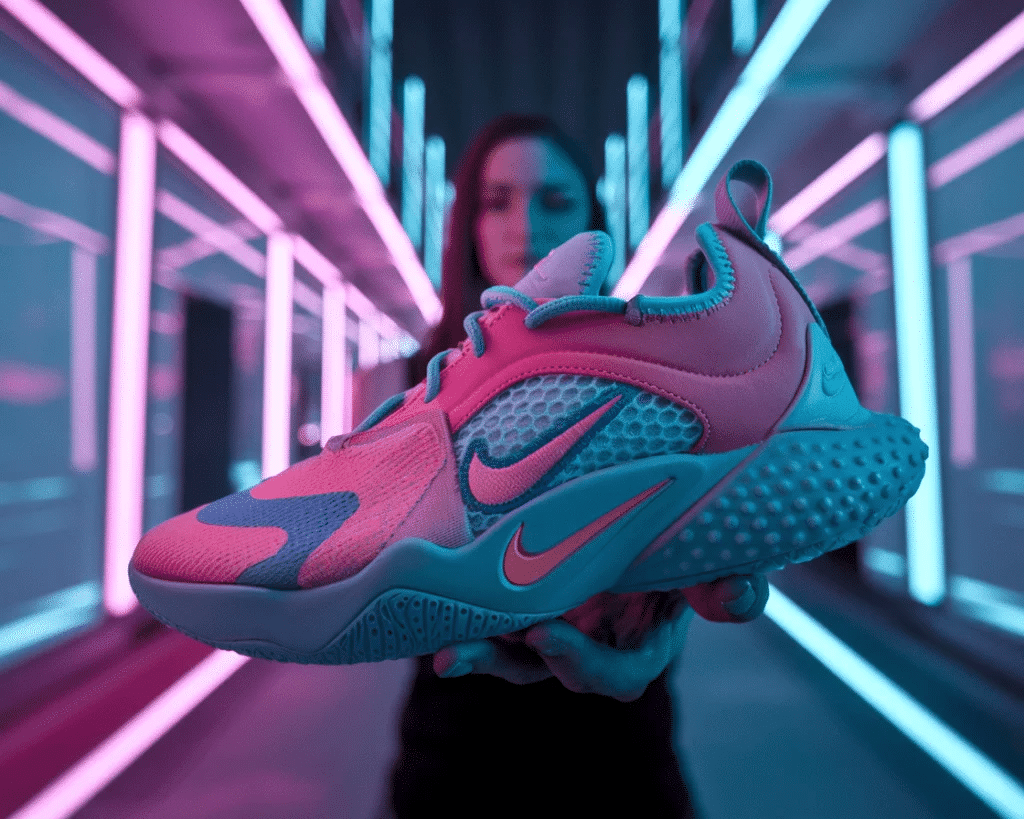
- Describe the type of animation desired (style, ratio, etc.). For example: “Futuristic sneaker held by a woman, with a neon-lit cityscape in the background. Vivid pink and blue lights cast soft highlights on the shoe’s contours. Camera zoom in to the nike logo, then zoom out and move around the shoes.”
- Wait to see your image come to life, in 2D or 3D depending on the prompt.
Scene Ingredients
- Upload several visuals: a character, an object, a location, etc.
- In the prompt, describe the scene. Example: “Cleopatra (in an Egyptian-inspired outfit) sitting on the modern couch in a gamer-style living room with neon lights and the ‘Monica Stream’ neon sign on the wall behind her. Cleopatra is looking directly toward the TV with a gaming controller in her hands. Comedic, vibrant atmosphere, slight camera zoom-in and moving to face cleopatra.”
- Pika Labs will combine these elements to produce a coherent clip, taking into account perspectives, colors and other details.
Examples of prompts that I tested with Pika 2.0:

Mathieu (photo) in a wizard robe, flying on a broom over Hogwarts, accompanied by Hermione Granger. The camera follows a diving motion toward the castle, magical atmosphere.

Shakespeare rapping on a hip-hop stage holding a golden mic, strobe lights, camera rotating around the subject.

A detailed image of a futuristic sneaker displayed on a reflective surface, with a neon-lit cityscape in the background. Vivid pink and blue lights cast soft highlights on the shoe’s contours. No people or clutter, just the sneaker as the main subject
Retouching with Pika 1.0
- Edit Region (Inpainting) : you choose an area on your video to add or remove an element (e.g. “sunglasses” to add glasses, “remove hat” to remove a hat).
- Expand Canvas : change the ratio by stretching the area to be generated (for example, going from a 16:9 format to a 9:16 format).
And how much does Pika cost?
If you are considering subscribing, please note that Pika offers different plans:
- Free account : 150 monthly credits, very slow generation, model 2.0 unavailable.
- €8 formula : 700 credits (i.e. 7 to 14 videos with Pika 2.0, depending on Scene Ingredients usage), watermark, no commercial use.
- Formula at €28 : 2,000 credits (around 20 to 40 videos with Pika 2.0), without watermark, commercial use permitted.
- “Pro” plan (~€76) : 6,000 credits (approximately 60 to 120 videos with Pika 2.0), without watermark, commercial use authorized.
Warning: the 2.0 model and the Scene Ingredients functionality consume a lot of credits (50 to 100 credits per generation), which quickly increases the bill.
You will find all the pricing information on this page. You will also see how your credits are deducted according to the model used (a preview is available at the bottom left of the interface).
Practical advice
- Prompt in english : Pika Labs handles English instructions better.
- Just the right amount of detail : a too busy prompt can confuse the AI. Take it gradually.
- Prompt negative : mention what you don’t want to see (blurry, warp, saturated color).
- Vary camera movements : if the result is blurry, adjust your prompt to reduce or change the camera movement.
My opinion on Pika 2.0
Pika 2.0 represents a real step forward in the field of AI-generated videos. The improvements made to text-to-video and image-to-video, combined with the innovative Scene Ingredients feature, open the door to many uses: teasers, advertisements, creative content, etc.
Obviously, there are still some areas for improvement: the cost may seem high for commercial use, and the quality does not always reach the level of some ultra-specialized AIs. Despite everything, it is a tool to follow closely for any creator, entrepreneur or simply curious person who wants to get started in AI applied to video.